Table of Contents
- Step 1: Take everything out and sort by category
- Step 2: Assign zones based on how often you use things
- Step 3: Contain loose items before buying anything
- Step 4: Add a few inexpensive bins where it counts
- Step 5: Label everything, even if you think you'll remember
- Common Mistakes
- Quick Recap
- Frequently Asked Questions
Quick Summary
Start by emptying the pantry completely and grouping everything into categories. Assign each category a zone, store items at eye level by how often you use them, and use a mix of free containers (jars, shoeboxes) and a few inexpensive bins before buying anything new. A full budget pantry refresh can realistically cost under $40.
If your "pantry" is really one deep cabinet, a narrow closet, or a few shelves above the fridge, you already know the problem: things get pushed to the back, duplicates pile up, and half-used bags of rice or pasta go stale before you find them again. None of that is a sign you need a bigger kitchen. It is almost always a sign the space has no system.
This guide walks through a low-cost, weekend-sized project to organize a small pantry using things you likely already have, plus a short, optional shopping list if you want to add a few bins later. The goal is not a picture-perfect pantry, it is a pantry where you can see what you own and use it before it expires.
If this is useful, you may also want The Best Cabinet Organizers for Small Kitchens (Renter-Friendly).
Step 1: Take everything out and sort by category
Clear the whole pantry onto your counter or kitchen table. This feels slower than organizing shelf by shelf, but it is the only way to see duplicates (three half-open bags of the same pasta shape is more common than people admit) and to check expiration dates without digging.
Sort everything into rough categories as you go: baking, canned goods, grains and pasta, snacks, breakfast, spices (if they live in the pantry), and "cooking oils and condiments that don't need the fridge." You don't need exact categories yet, just enough grouping to see how much space each type actually needs.
Step 2: Assign zones based on how often you use things
Once everything is grouped, decide where each category goes using one simple rule: things you reach for weekly go at eye level and within easy arm's reach; things you use monthly (holiday baking supplies, bulk backups) go up high or down low; heavy items like bulk rice, canned goods, or bottled water go on the lowest shelf so they're not a strain to lift.
This is called zoned organization, grouping items by both category and frequency of use, rather than just cramming similar things together. It's the single change that makes the biggest difference in a small pantry, because it removes the daily friction of climbing on a stool for something you need every day.
Related reading: 10 Clever Spice Rack Ideas for Small Kitchens.
Step 3: Contain loose items before buying anything
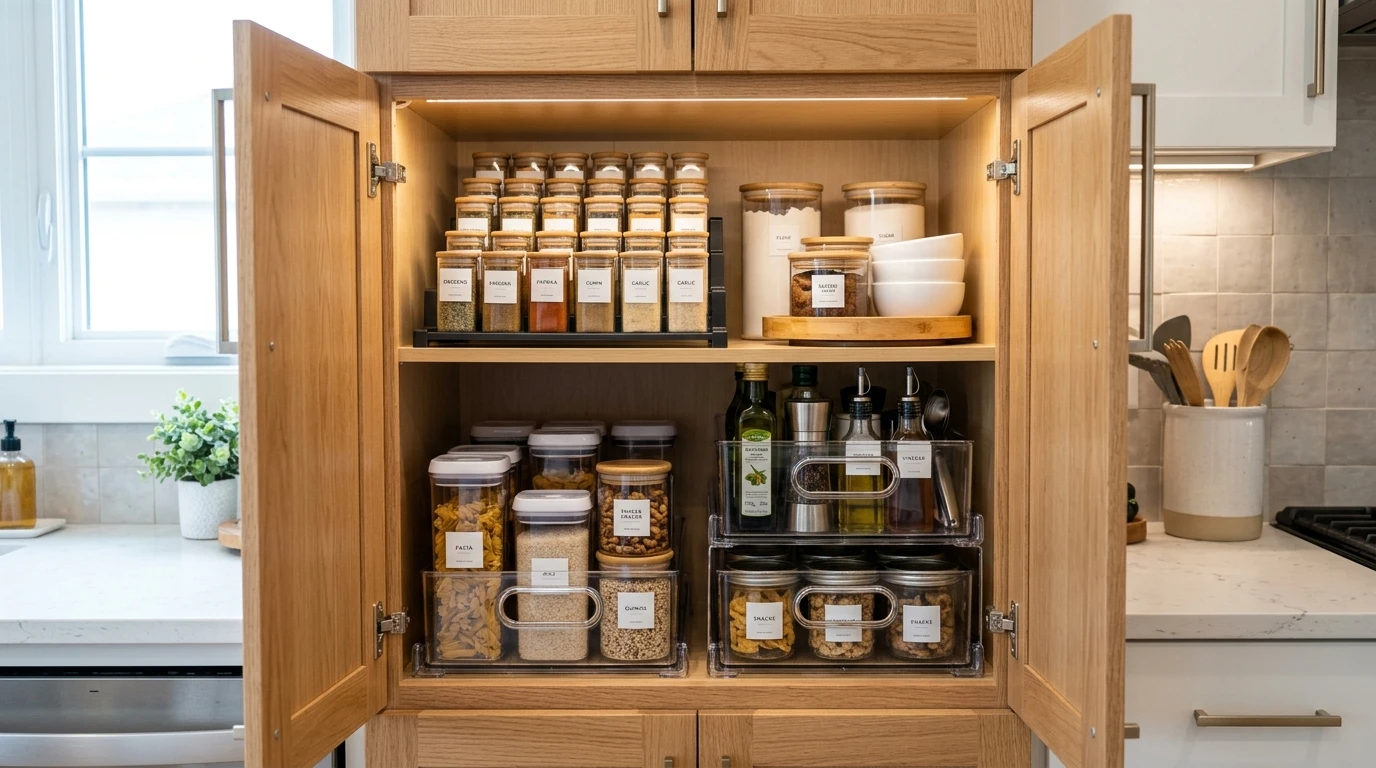
Loose bags of snacks, half-empty cereal boxes, and open bags of flour are the main reason small pantries look chaotic even when they're not overfull. Before spending money, look around your home for containers you can repurpose: glass jars from pasta sauce or pickles, sturdy shoeboxes or shipping boxes cut down to size, and empty yogurt tubs for smaller items like tea bags or seasoning packets.
Group similar loose items into one container each, "snack bars," "seasoning packets," "baking mixes", so you're opening one container instead of shuffling six bags to find what you want.
We go deeper on this topic in Small Entryway Organization Ideas for Apartments.
Step 4: Add a few inexpensive bins where it counts
Once you've used what you have, a small, targeted purchase goes further than buying a full matching set. Two or three stackable bins for the shelf you use most, plus a set of clear, airtight containers for staples like flour, sugar, rice, or pasta, usually cover 90% of the benefit for a fraction of the cost of a full pantry makeover.
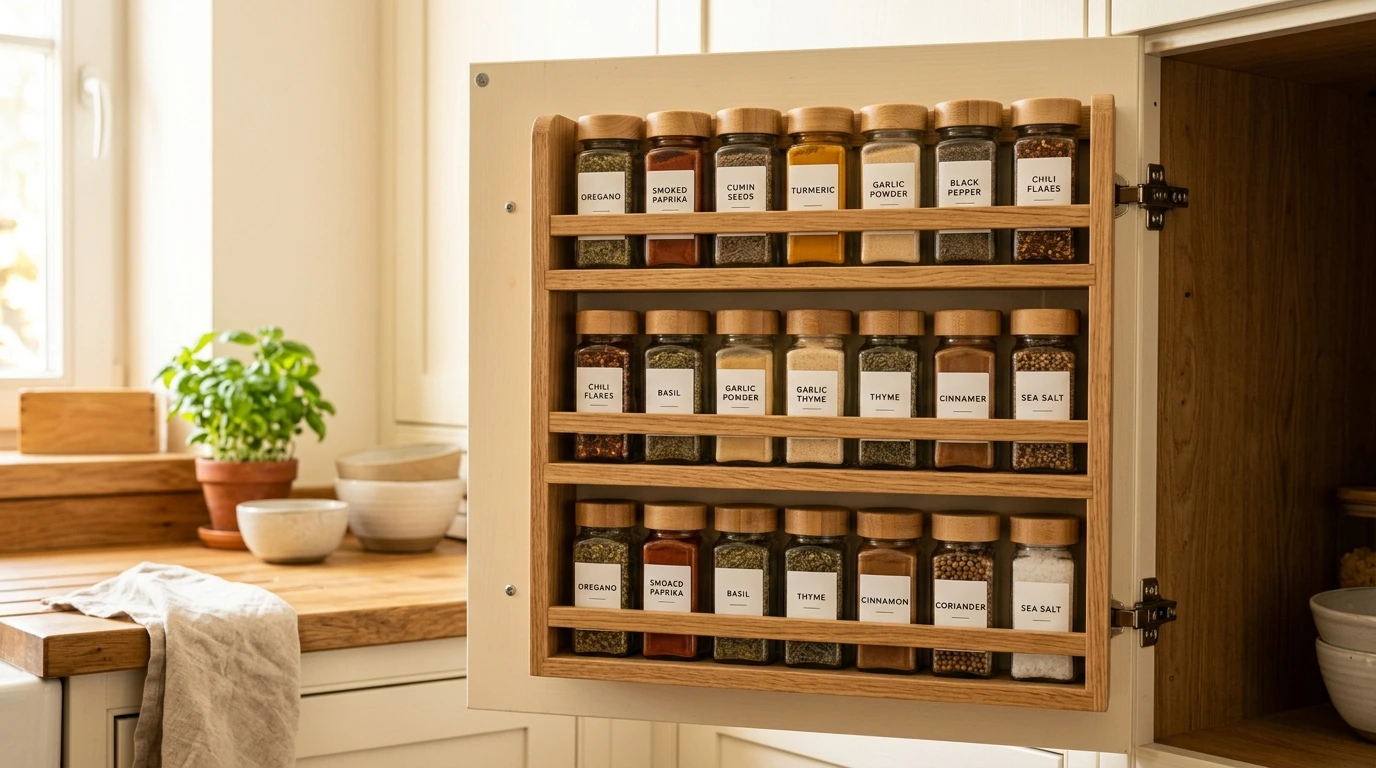
Discount stores, dollar stores, and big-box grocery stores all carry inexpensive bins that work fine here, you don't need a specific brand for this to work. If you rent, avoid anything that requires drilling; adhesive hooks rated for kitchen use and free-standing shelves or bins are the renter-friendly option, a theme covered in more depth in our guide to
Step 5: Label everything, even if you think you'll remember
Labels aren't just for aesthetics. In a shared household, labels stop the "where does this go back" problem that quietly undoes an organized pantry within a month. A basic label maker, painter's tape and a marker, or printed sticker labels all work equally well, the label matters more than the material.
Label bins by category rather than by exact product ("pasta & grains" instead of "penne"), so the system still makes sense when the specific brand you buy changes.
We go deeper on this topic in The $50 Small Kitchen Organization Challenge.
For more like this, visit our Kitchen Organization guides.
| Item you need | Free option | Budget option (under $10) |
|---|---|---|
| Store flour, sugar, rice | Reused glass jars or pasta jars, washed | Clear airtight canister set |
| Corral snack bags | Cut-down cereal box or shoebox | Stackable plastic bin |
| Group spice packets | Empty tissue box, cut down | Small mesh or wire basket |
| Lift cans for visibility | Nothing needed | Stepped can riser shelf |
| Label containers | Painter's tape + marker | Basic label maker |
Tip
Before buying any container, measure your deepest shelf and your narrowest cabinet opening. A bin that looks small in a store photo can still be too wide to fit through a cabinet door.
Watch Out For
If you rent, check your lease before installing anything that requires drilling, such as door-mounted racks with screws or wall-mounted shelving. Command-style adhesive hooks and free-standing bins avoid this issue entirely.
Common Mistakes
- Buying a full matching bin set before sorting, then discovering half the bins are the wrong size for your shelves.
- Organizing shelf by shelf instead of emptying the whole pantry first, which hides duplicate and expired items.
- Stacking bins so tall that you can't see what's in the back ones without unstacking them.
- Using opaque containers for everyday staples, which brings back the "out of sight, out of mind" problem you were trying to fix.
- Skipping labels because "I'll remember," which works for about two weeks in most households.
Quick Recap
- Empty the pantry completely and sort everything into categories.
- Assign eye-level shelves to weekly items and top/bottom shelves to occasional or heavy items.
- Contain loose bags and packets using free or reused containers first.
- Add two or three targeted bins only where you genuinely need them.
- Label every container by category, not by specific product.
Frequently Asked Questions
How do I organize a pantry without built-in shelves?
Use a free-standing wire or wood shelving unit sized to your closet or cabinet, then apply the same zoning and containing steps above. Over-the-door organizers also add storage without needing existing shelves.
What's the cheapest way to organize a small pantry?
Reusing containers you already own, jars, boxes, tubs, combined with painter's tape labels costs close to nothing and solves most of the visibility problem before you buy anything.
Should I decant everything into matching containers?
It's optional. Matching containers look tidy and can save space by removing bulky boxes, but zoning and labeling matter more for actual usability than uniform containers do.
How often should I redo my pantry organization?
A quick 5-minute reset weekly (returning stray items to their zone) plus a fuller review every few months, especially after big grocery trips or holidays, keeps the system working without a full redo.
Where should heavy items like canned goods go?
On the lowest shelf, ideally at a height where you can lift with your legs rather than bending your back, since cans are dense and awkward to carry from a high shelf.
What if I don't have a pantry at all?
A single deep cabinet, the top of a closet, or even a bookshelf with bins can function as a pantry using the same zoning principles, the space doesn't need a dedicated room to work.
Conclusion
A small pantry doesn't need a renovation, and it doesn't need a full set of matching containers on day one. Emptying it, sorting by category, zoning by how often you reach for things, and containing loose items will solve most of the daily frustration on its own. Add a handful of inexpensive bins only where they solve a real problem, and label everything so the system survives contact with a busy week.

Real Home Habits Editorial Team
Real Home Habits Editorial Team writes practical, step-by-step home organization guides for renters, small-space dwellers, and busy families.